
Tokyo Kyoto Osaka 10 Day Itinerary: A Practical First-Time Japan Route
A realistic 10 day Tokyo, Kyoto, and Osaka itinerary that helps first-time visitors choose bases, transfer days, day trips, rail checks, and backup time before booking.
At a glance
- Best for
- First-time
- Main decision
- Which bases and transfer days make the route realistic
- Time needed
- 30-45 minutes to compare route options
- Official checks
- Opening hours, transport schedules, weather, reservations
- Related tool
- Budget Calculator
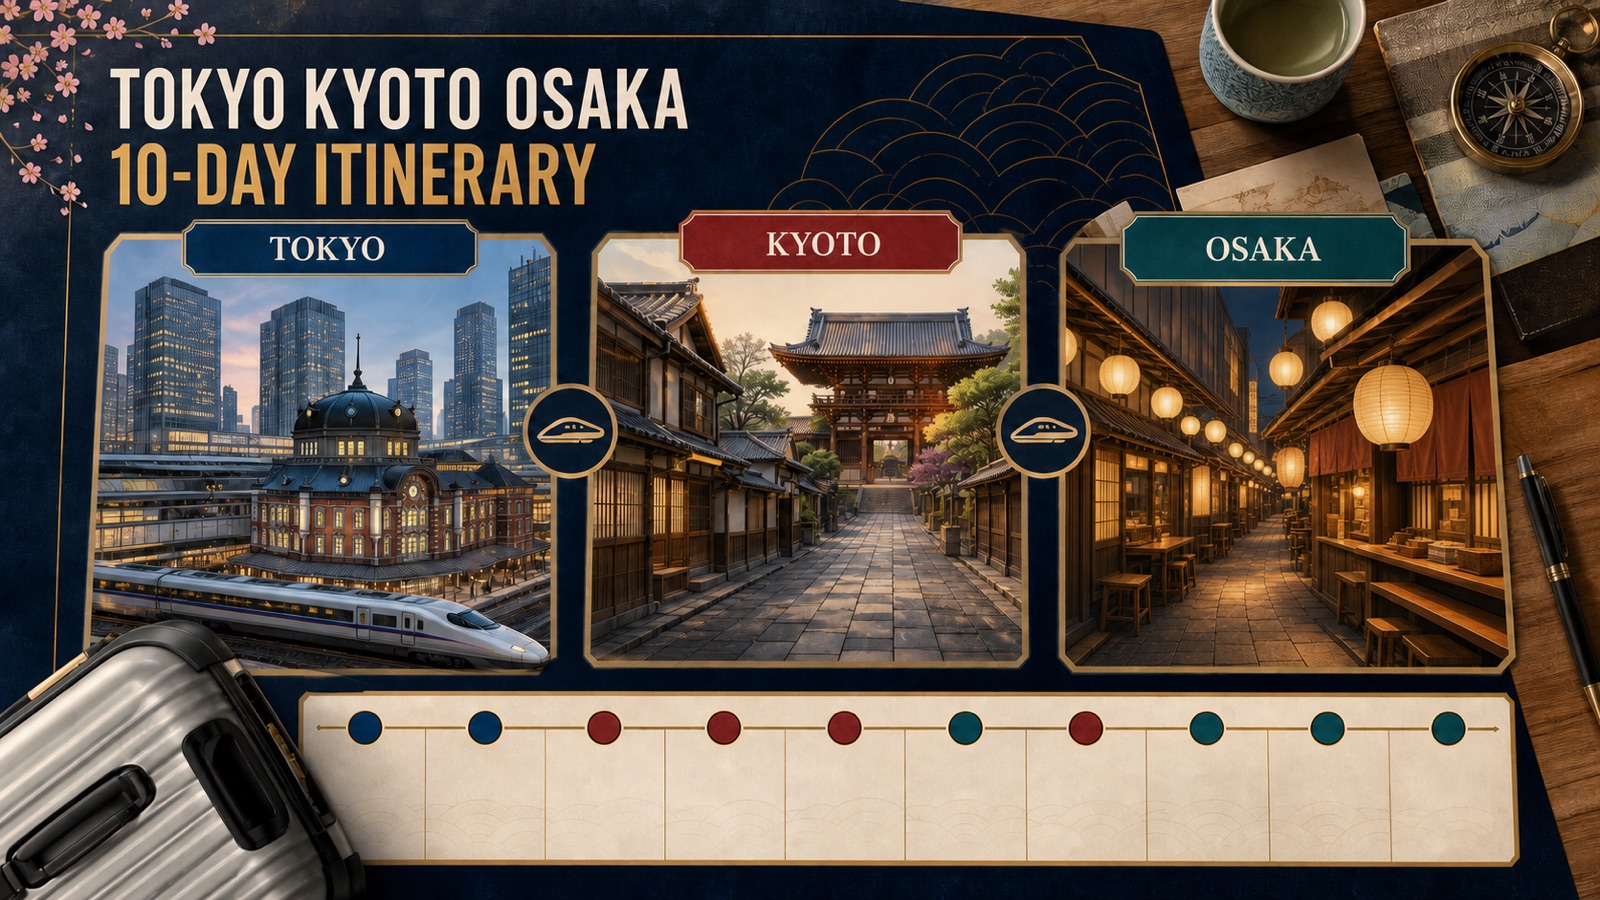
Write the trip as overnight bases before writing attractions: Tokyo four nights, Kyoto three nights, Osaka two nights, and one final night chosen by airport. Then place only one major job on each day. If a day needs to be a transfer day, let it be a transfer day. If a day needs to be an early Kyoto morning, do not load it with a late Osaka night unless your group genuinely wants that pace.
Quick answer: the best 10 day Tokyo Kyoto Osaka route
For most first-time visitors, the strongest 10 day Tokyo Kyoto Osaka itinerary is four nights in Tokyo, three nights in Kyoto, and two nights in Osaka, with the last night assigned by departure airport or late-flight risk. That structure gives Tokyo enough time for arrival recovery and neighborhood variety, gives Kyoto enough early mornings for temples and old streets, and gives Osaka a real evening identity instead of treating it as only a dinner stop.
The route works best when you make one clean long-distance transfer from Tokyo to Kyoto by Tokaido Shinkansen, then use Kyoto and Osaka as short Kansai bases. JR Central states that the Tokaido Shinkansen connects Tokyo and Kyoto in about 130 minutes, and its timetable page warns that not every train is listed in the basic timetable and that extra trains can vary by season, event, day of week, and other reasons. That is why this page gives a route shape rather than a fixed train number.
Use this itinerary as a decision plan, not a rigid attraction checklist. Tokyo is large and multi-centered. Kyoto rewards early starts and area grouping. Osaka is strongest at night, food, shopping, and Kansai logistics. If you try to see every famous stop in all three cities, the trip becomes mostly transfers. If you protect base nights, luggage time, and one weather buffer, the same 10 days feel much more expensive in value even if the budget is unchanged.
Who this itinerary is for
Use this page if this is your first Japan trip, you have 9 to 10 nights on the ground, and you want the classic route without guessing where to sleep. It is written for travelers flying into Tokyo or Osaka, using trains between major cities, and wanting a balanced mix of city food, temples, shopping, museums, and one realistic side trip.
It is also useful if you have already seen a dozen overstuffed day-by-day plans and need to decide what to remove. A first trip should leave room for jet lag, station learning, rain, luggage forwarding, restaurant waits, and one slow morning. If your group includes children, older travelers, large suitcases, or a tight budget, the advice here becomes more important, not less.
This is not a live timetable or ticket page. Opening hours, special exhibitions, rail schedules, peak-period seat rules, and attraction reservations change. The official pages used for this update were checked on 2026-07-15, but you should recheck operator and city pages before buying fixed tickets or choosing a non-refundable hotel.
| Traveler situation | Use this route for | Adjust before booking |
|---|---|---|
| First Japan trip | A stable Tokyo, Kyoto, and Osaka sequence with enough base time to learn the transport system | Do not add Hiroshima, Fuji, Nikko, and Nara unless you remove something else |
| Food and city traveler | Tokyo variety, Kyoto markets and traditional streets, and Osaka evenings | Give Osaka at least one real night rather than only passing through |
| Temple and culture traveler | Kyoto early mornings plus Tokyo old-town or museum time | Stay in Kyoto three nights and avoid doing every Kyoto area by bus at midday |
| Family or luggage-heavy trip | Fewer hotel changes and clearer transfer days | Use hotel-area and station-exit checks before chasing the cheapest room |
| Budget-conscious traveler | Route discipline before rail-pass decisions | Price exact Shinkansen and local legs before assuming a pass is cheaper |
10 day route table
This table is the planning backbone. It gives each day one job. Some days are for city discovery, one day is for the major transfer, and one day is for a side trip or recovery choice. If a day starts to carry two or three jobs, split it or remove something.
The classic direction is Tokyo first, Kyoto second, Osaka third. The reverse works if your flights make Osaka the better arrival point, but keep the same principle: do not change hotels just to save a few minutes on one attraction. Change hotels only when the next base improves several days.
| Day | Base | Main decision | Practical route shape |
|---|---|---|---|
| 1 | Tokyo | Arrive, recover, and keep the evening simple | Sleep near a station that fits your airport route; choose one nearby dinner area only |
| 2 | Tokyo | Old Tokyo, museums, or east-side orientation | Asakusa, Ueno, Tokyo Station, or a river-side plan works well before jet lag fades |
| 3 | Tokyo | Modern Tokyo and shopping energy | Shibuya, Harajuku, Shinjuku, Ginza, or Roppongi should be grouped by side of the city |
| 4 | Tokyo | Flexible Tokyo day or light day trip | Use this for weather, Disney, Kamakura, Nikko, Hakone planning, or the neighborhood you skipped |
| 5 | Kyoto | Transfer to Kyoto and do one compact Kyoto area | Take the Shinkansen, leave luggage, then choose Kyoto Station, downtown, or a nearby evening walk |
| 6 | Kyoto | Early-start temple and old-street day | Higashiyama, Gion, Kiyomizu, or Philosopher Path style plans need crowd-aware timing |
| 7 | Kyoto | Second Kyoto area or Nara/Uji choice | Use trains where possible; do not chain distant temples by midday buses |
| 8 | Osaka | Move to Osaka and switch to food/nightlife mode | Base around Namba, Umeda, or a station that fits your departure and Kansai side trips |
| 9 | Osaka | Osaka full day or Kansai side trip | Choose Osaka Castle and Namba, Universal Studios Japan, Nara, Kobe, Himeji, or a slower food day |
| 10 | Departure city | Protect airport timing and final shopping | Sleep in Osaka, Kyoto, or Tokyo depending on your flight and transfer risk |
Why this route order works
Tokyo first works because international arrivals usually need a softer landing. JNTO describes Tokyo as Japan capital and a metropolis with tradition, innovation, eating, shopping, and exploration spread across many districts. That means a first Tokyo stay should be area-based, not attraction-based. One day can cover older east-side Tokyo such as Asakusa and Ueno. Another can cover Shibuya, Harajuku, Shinjuku, or Ginza. A third flexible day absorbs jet lag or bad weather.
Kyoto second works because it is culturally dense but physically slower. JNTO notes that Kyoto has culture refined over more than 1,200 years and that travelers should consider local communities and crowding. Kyoto City official guidance also recommends using trains and subways where practical because buses to famous sights can be crowded depending on season. A three-night Kyoto stay lets you start early twice, which is more useful than adding another famous temple at noon.
Osaka third works because it changes the mood at the end of the trip. JNTO describes Osaka as relaxed, food-focused, and strong for nightlife, shopping, and history. It is also a useful Kansai base. Ending there can make sense if you depart from Kansai International Airport, but it can also work before returning to Tokyo if your flight route requires it. The rule is simple: the final night should serve the airport, not the romantic idea of squeezing in one more distant sight.
Base-night decision table
The hotel pattern matters as much as the sightseeing pattern. Four Tokyo nights, three Kyoto nights, and two Osaka nights is the default because it creates only two major hotel changes before the departure setup. If you reduce Kyoto to two nights, you lose the second early morning. If you reduce Tokyo to three nights, you often lose the flexible day that makes the route survivable after a long flight.
A 10 day route is short enough that poor bases are expensive. A cheaper hotel far from the daily direction can cost time, local fares, taxis, and patience. Before booking, test three routes for every hotel: airport or Shinkansen arrival to hotel, hotel to first planned morning, and hotel to next transfer point.
| Base split | Best for | Main tradeoff |
|---|---|---|
| 4 Tokyo / 3 Kyoto / 2 Osaka / 1 airport or final city | Most first-time trips with a balanced route | Requires discipline not to add too many side trips |
| 5 Tokyo / 3 Kyoto / 1 Osaka / 1 final city | Travelers who care more about Tokyo shopping, museums, and neighborhoods | Osaka becomes a short food stop unless the final night is there |
| 3 Tokyo / 4 Kyoto / 2 Osaka / 1 final city | Temple, garden, craft, and slower Kyoto travelers | Tokyo can feel rushed after arrival |
| 4 Tokyo / 4 Kyoto / 1 Osaka / 1 final city | Travelers using Osaka mainly for one evening or airport logistics | Less time for Osaka food, nightlife, and shopping |
| Open-jaw Tokyo in, Osaka out | Efficient classic route with no forced return to Tokyo | Flights may cost more; airport timing must be checked early |
Step-by-step planning action plan
Step 1: lock the flight direction. If your best fare arrives in Tokyo and leaves from Kansai International Airport, the classic east-to-west route is clean. If you must return to Tokyo for the flight, protect the last night near the correct Tokyo transport line or keep the final day very light. Do not leave a long Osaka-to-Tokyo transfer for the same morning as an international departure unless the flight time and delay tolerance are genuinely comfortable.
Step 2: choose hotel bases before choosing every attraction. In Tokyo, decide whether your real days point west, east, central, or airport-forward. In Kyoto, choose between Kyoto Station convenience, downtown dining and shopping, Gion/Higashiyama atmosphere, or a quieter area. In Osaka, choose Namba for food and nightlife, Umeda for rail access and shopping, or a transport-first base for an early airport or Shinkansen move.
Step 3: reserve the long-distance rail after the route is stable. Check JR Central or Smart EX style official pages for Shinkansen schedules, seat availability, oversized baggage rules, and peak-period notices. The exact train matters less in the first draft than the transfer window: hotel checkout, station navigation, lunch, luggage, arrival, and first Kyoto activity.
Step 4: group sightseeing by area. Tokyo days should not jump repeatedly between east and west. Kyoto days should avoid bus-heavy cross-city zigzags. Osaka days should not start with a distant side trip unless you still have a proper Osaka evening. Step 5: assign the side trip last. Nara, Uji, Himeji, Kobe, Hakone, Kamakura, Nikko, Disney, and Universal Studios Japan can all be right for different travelers, but a 10 day classic route usually needs only one or two.
Step 6: build a bad-weather and fatigue plan. Put museums, covered shopping streets, easy food halls, laundry, and a short evening walk into the backup list. Step 7: verify official pages one final time after the major bookings are done. This is when you check train notices, attraction closures, reservation windows, city guidance, accommodation tax, and airport transfer timing.
Tokyo days: choose neighborhoods, not random icons
A good Tokyo section has three different roles. The arrival day teaches the station and neighborhood. The first full day should be forgiving: Asakusa, Ueno, Tokyo Station, Ginza, or another compact area with food and indoor options. The second full day can carry higher energy: Shibuya, Harajuku, Shinjuku, Roppongi, or another west/central combination. The flexible day can be Disney, Kamakura, Nikko, Hakone planning, shopping, museums, or the district you missed.
JNTO notes that Shinjuku is home to the busiest train station in the world and has many rail and subway operators in the station complex. That is a planning warning, not just trivia. If you stay near Shinjuku, know your hotel exit and keep your first evening simple. If you stay near Ueno, Asakusa, Tokyo Station, or Ginza, you may get calmer arrival logistics but a different nightlife style.
Do not turn Tokyo into a checklist of one-photo stops. A better day has a morning anchor, a lunch area, an afternoon district, and a realistic dinner return. If the route crosses the city twice, it is probably not a first-trip day anymore.
Kyoto days: protect early starts and reduce bus dependence
Kyoto is where many 10 day itineraries become too ambitious. The city is famous, compact on a map, and much slower in real life when crowds, temple hours, buses, heat, rain, and narrow streets are involved. JNTO specifically recommends using less busy times, such as early morning or night where appropriate, and being considerate of local communities. Kyoto City official guidance notes that buses to places such as Kinkaku-ji and Kiyomizu-dera can be crowded depending on season and recommends trains and subways for travel in all directions where possible.
A strong Kyoto structure is one early Higashiyama or Gion/Kiyomizu area day, one northwest/Arashiyama/Nijo/Gosho style day, and one flexible Nara, Uji, Fushimi Inari, market, or rest choice. If you only have two Kyoto nights, do not pretend you have three mornings. Stay central, pick the one atmosphere that matters most, and let Osaka or Tokyo carry the rest of the trip.
Kyoto is also where responsible travel belongs inside the itinerary. Do not stop maiko for photos, do not block small streets, and do not treat residential lanes as a stage set. The better plan is quieter timing, smaller area groups, and enough time to leave luggage before sightseeing.
Osaka days: give the city a real job
Osaka should not be the accidental city at the end of the route. Give it a job: food and nightlife, Universal Studios Japan, Osaka Castle and river areas, shopping, a Kansai side trip, or a departure base. JNTO describes Osaka as relaxed, playful, and known for food, fun, nightlife, shopping, and some history. That personality is strongest when you are not exhausted from a full Kyoto bus day before arriving.
If you stay in Namba, plan a food and shopping evening around Minami, Dotonbori, Shinsaibashi, or nearby areas. If you stay in Umeda, use the rail access and department stores. If you choose Shin-Osaka, do it for transport, not atmosphere. For a first route, one full Osaka day can be enough if your goal is food and city energy. Add a second full Osaka day only if you are doing a theme park, Himeji, Kobe, or a slower Kansai plan.
Common mistakes
The first mistake is adding too many day trips. A 10 day route with Tokyo, Kyoto, Osaka, Hakone, Nikko, Nara, Himeji, Hiroshima, Disney, and Universal Studios Japan is not a 10 day itinerary; it is a transit endurance test. Pick the side trips that match your traveler type and remove the rest.
The second mistake is treating Kyoto and Osaka as interchangeable because they are both in Kansai. Kyoto is stronger for early temples, traditional streets, gardens, and careful pacing. Osaka is stronger for food, nightlife, shopping, theme parks, and rail logistics. Staying in one and visiting the other every day can work, but only if the hotel location and late return are convenient.
The third mistake is buying transport before the route is stable. A rail pass, subway ticket, or airport transfer can be good value only against actual legs. The fourth mistake is ignoring luggage. A hotel change with sightseeing in the middle needs luggage storage, forwarding, or a very simple transfer. The fifth mistake is leaving the airport plan for the final night. Departure logistics should decide the last base as early as hotels do.
What to verify on official sources
Verify the Shinkansen schedule, seat rules, and reservation method on official JR Central or JR operator pages before buying tickets. JR Central timetable guidance checked on 2026-07-15 says the posted timetable is basic, not all trains are listed, and extra trains can depend on season, events, day of week, and other reasons. Peak-period reserved-seat rules can also affect how comfortable a casual plan is.
Verify city and attraction pages for opening days, special events, crowd guidance, luggage storage, and local manners. For Kyoto, use Kyoto City official travel guidance for accommodation areas, getting around, crowd-aware routes, and accommodation tax. For Tokyo and Osaka, use JNTO and operator pages as orientation, then check each attraction or transport operator before committing fixed times.
Verify hotel taxes, room rules, and cancellation terms from hotel and city pages. Verify airport transfer routes on the actual day of week and arrival time. Verify any theme park, museum, observation deck, festival, or special exhibition on the operator page because timed-entry rules and sold-out dates are not stable enough for an evergreen itinerary page.
- Check Shinkansen timetable and seat notices after your exact travel date is known.
- Check whether your luggage needs forwarding, station storage, or an oversized baggage reservation.
- Check Kyoto bus, subway, and train route advice before planning midday cross-city moves.
- Check the final airport route before choosing the last hotel night.
- Check official attraction pages for closure days and reservation windows.
If you only do one thing
Write the trip as overnight bases before writing attractions: Tokyo four nights, Kyoto three nights, Osaka two nights, and one final night chosen by airport. Then place only one major job on each day. If a day needs to be a transfer day, let it be a transfer day. If a day needs to be an early Kyoto morning, do not load it with a late Osaka night unless your group genuinely wants that pace.
After that, test the three hard routes: arrival airport to first hotel, Tokyo to Kyoto hotel, and final hotel to departure airport. If those are clean, the whole itinerary becomes easier to improve. If those are messy, no attraction list will rescue the trip.
Related tools and next planning links
Use the Trip Planner after you have chosen base nights. Use the JR Pass Value Checker only after exact long-distance legs are known. Use the Airport Transfer Finder before choosing the first and last hotels. Use the Luggage Planner before adding Hakone, Nara, Himeji, or a hotel change with sightseeing in the middle.
Next, compare the Japan 10 Day Itinerary, Japan 7 Day Itinerary, Where to Stay in Tokyo First Time, Where to Stay in Kyoto First Time, JR Pass Worth It, Narita to Tokyo Transfer, and Haneda to Tokyo Transfer. Those pages convert the route shape into booking decisions.
Use next on Japan Trip Tools
- Japan 10 Day Itinerary — Compare this classic route with the broader 10 day planning framework.
- Where to Stay in Tokyo First Time — Pick the first base by airport, rail, and daily route.
- Where to Stay in Kyoto First Time — Choose the Kyoto base before finalizing temple days.
- Is the JR Pass Worth It? — Check rail value after route legs are known.
- Narita to Tokyo Transfer — Use if your first arrival is Narita.
- Haneda to Tokyo Transfer — Use if your first arrival is Haneda.
Sources and image licensing
- JNTO Tokyo destination guide (checked 2026-07-15)
- JNTO Kyoto destination guide (checked 2026-07-15)
- JNTO Osaka destination guide (checked 2026-07-15)
- JR Central Kyoto by Shinkansen (checked 2026-07-15)
- JR Central Shinkansen timetable notes (checked 2026-07-15)
- Kyoto City Official Guide to getting around Kyoto (checked 2026-07-15)
- Kyoto City Official Guide to accommodation areas (checked 2026-07-15)
- Kyoto City Official Guide to sightseeing manners and smart routes (checked 2026-07-15)
Plan your next step
FAQ
Is 10 days enough for Tokyo, Kyoto, and Osaka?
Yes, if you treat it as a classic first route rather than a complete Japan tour. Four Tokyo nights, three Kyoto nights, and two Osaka nights is realistic when you limit side trips and protect transfer time.
Should I start in Tokyo or Osaka?
Start where your flights make the route cleaner. Tokyo-in and Osaka-out is efficient for many first trips, but Osaka-in and Tokyo-out works if you keep the same base-night logic.
How many nights should I spend in Kyoto?
Three nights is the practical minimum for a first trip that wants more than one early Kyoto morning. Two nights can work only if you choose a tighter Kyoto plan.
Do I need a JR Pass for this route?
Not automatically. Price the exact long-distance legs first, then compare the pass cost and eligible trains. A simple Tokyo to Kyoto or Shin-Osaka leg may not justify a national pass.
Should I stay in Kyoto or Osaka for Kansai?
Stay in Kyoto for early temples and traditional streets. Stay in Osaka for food, nightlife, shopping, theme parks, or easier late evenings. Many first trips benefit from staying in both.
What is the biggest mistake on this itinerary?
Adding too many side trips. A 10 day route needs one or two carefully chosen extras, not every famous place between Tokyo and Hiroshima.
Where should the final night be?
The final night should serve your departure airport and flight time. Choose Osaka, Kyoto, or Tokyo based on the actual route to the airport, not only on the city you like most.
When should I recheck official sources?
Recheck after dates are fixed, before buying rail or attraction tickets, before non-refundable hotel bookings, and again shortly before departure for timetable, weather, and closure changes.